Have you ever imagined prehistoric times without the aid of sanders? How were the craftsmen able to smoothen wooden items? How much stress and uneven surfaces did woodworkers go through?
As woodworkers, we understand the importance of sanders. Maybe sometimes you try thinking what woodwork would be without sanders, sandpapers, the variety of grits, and other power tools.
These amazing inventions are the very heart of interior decoration. From amazing wood sculptures in renowned 7-star hotels to that wooden vase in your kitchen, sanders play a very important role in woodwork.
However, there are principles to be engaged while using these pieces of equipment. If these rules are violated, there are chances you can do more harm than good. These harms could be to you and/or your work.
For one, there is an appropriate sander for every stage of woodworking. Sanders such as the belt sanders, random orbital sanders, sheet sander, palm sander, and their relative grit sizes are designed to carry out specific roles.
While some of this equipment can play out many roles, nonetheless, there is the ideal sander for the ideal job.
Consider this if you desire to know how to use a sander appropriately, you are at the right place. Just read on as we share safety precautions, specific roles of some sanders, and the do’s and don’ts while using them.
If you prefer a visual explanation of this article, below is a detailed and helpful video.
Video: How To Use a Sander (Measures and Precautions for Sander)
How Do You Use a Sander?
To use a sander, you must handle the equipment appropriately. You must also ensure that you are not putting yourself in harm’s way. To do this effectively, below are some helpful tips.
1. Ensure that you are safe
“How Do You Use a Sander”
2. Ensure that you cannot be electrocuted
3. Sanding should be one step at a time
4. Deal effectively with the sander’s dust
5. Wear an eye protector
6. Wear ear protector
7. Be careful around the edges
8. Do not tilt the equipment
9. Sand in line with the grain pattern
10. Do not apply too much body pressure on the sander
11. Be careful about how you start sanding
12. You can use pencil marks for guidance
13. Figure out how best to work with the wires
Your Safety Is of Utmost Importance
As a woodworker, you have that desire to make out top-notch wood items. However, there is something more important than that expectation: your safety.
In the line of duty, lots of woodworkers have sustained injuries and health complications. Sometimes, these negative situations can be life-threatening and/or irreversible.
In this light, you should not put your body and safety on the line. No job or wooden piece is worth your good health and perfect state of mind. Let every job allow you to do the next one.
In this light, realize that using these machines will mean you are faced with industrial pieces of equipment. This implies your safety is non-negotiable. In our bid to be pragmatic, let’s share some precautions to be observed if you must use any sander equipment.
Eliminate the Chances of Electrocution
Undoubtedly, electricity and electronics are great inventions. However, the devil is always in the detail. We all know that electrocution is the terrible side of electronics, as well as electrical inclined pieces of equipment.
The effects can be very grievous with heavy-duty industrial machines. Well, the good news is electrocution can be avoided. All it takes is caution and sticking to the right measures.
Although some sander brands are currently into the production of cordless sanders, wired sanders are still popular. If you are unable to buy and/or use a cordless sander, you should frequently be on the look-out for exposed parts of the wire.

Always check out the wires of your sander. Make sure there is no exposed opening, also known as naked wires. This way, you eliminate contact between your body and the wire.
One Step at a Time
As a woodworker, chances are that you have so much to do. This might have you thinking about cutting corners and skipping measures. Well, you will have to go easy on that!
Regardless of how much workload you must accomplish, take the next instruction seriously. Never plug your sander into the power socket with your switch button still on. This creates a vibration you might not be prepared to deal with.
It should be one step at a time. First, make sure your sander is stationed on the wood you need to sand. Secondly, connect the plug of your sander to the power source. Afterward, you can switch on the power button for use.
Do not switch on your sander’s power button/switch before connecting the plug to the wall socket or power source. This way, you are well prepared before sanding and protected from odd contact with the sanders.
And just as a reminder, your sander should be set on the wood before use.
Deal with the Dust
Asides from safeguarding yourself from the physical havoc of using the sander, be cautious about inhaling dust. In this regard, never use a sander without wearing a dust mask. Using the appropriate mask will keep you safe from flying dust particles from the sanded wood.
This will prevent health complications that can arise from inhaling dust. Particularly, you should take this seriously if you applied sanding sealers or any form of coating before sanding. These materials contain toxic materials that should not be inhaled.

Any or frequent intake of these substances will have adverse effects on the body system. Do not forget the need to stay safe and healthy.
In dealing with the dust, you should also check out for the dust extraction system of the equipment. Many of these pieces of equipment come with dust bags. The dust bag sucks off the dust particles from the sanding process. Periodically check that these bags are well fitted to the machine and functional.
Furthermore, always empty the bags at the appropriate time. If enormous dust is trapped in the dust bag, it’ll be unable to trap any more sanded dust particles.
Better still, we recommend you connect the sander to your vacuum cleaner. Considering the size of the average vacuum, it would be able to trap more dust particles than the dust bag.

Asides from the amount of dust that can be stored, the vacuum is better off with clean-ups than the dust bag.
To attach the vacuum to the sander, you would need a tube designed for this purpose. When you make a purchase, some sander products add this item as a part of the package. However, there is no problem if yours does not have this item. This is given how these products are relatively cheap.
The need for body protection takes us to the next point.
Look Out for Your Eyes
As with the use of a mask for your nose, you need to protect your eyes from dust and other particles. In that light, under no circumstance should you sand without using an eye protector.

The eye protector does two important things. First, it protects your eyes from flying dust particles and wood by-products. Secondly, it helps you get an uninterrupted focus while sanding.
Chances are that you are overwhelmed with the amount of dust and cannot see properly. In dealing with this problem, the eye protector allows you sand without worrying about dust particles getting in your face.
This way, you can concentrate on getting the required smooth wood surface that is needed. The bottom-line remains that you are better off using the aid of the eye protector.
Do Not Leave Out Ear Protection
Some wordmakers use the dust mask and eye protector but leave out the ear protector. This is a practice you should not indulge in. The ear protector is as important as the other forms of protection.
In plain terms, the noise caused by most of these machines are beyond the range humans will safely adjust to. To avoid adverse consequences, using the ear protector is not up for questions.

Furthermore, many of these products are not hard to use. All that is required is for you to attach the two ends to your ears. Afterward, you are safe from the noisy side effects of your sander.
Now you know some safety precautions to be observed while using the sanders. On the other hand, let’s talk about how to make the most of a sander on your wood. What should you avoid while sanding?
Video: How to Use a Sander
Below is a visual explanation of how to use a sander, as well as some types of sanders
Stay Within the Reach
Depending on the piece of wood you want to sand, you will need to sand close to the edges. You should be very careful at this point. This precaution is especially for large sanders, such as the belt sanders.
Never use more than a third of the machine at the edge. Evaluate the size of your machine and do not allow any more than one-third of the machine past the edge of your wood. This way, the chance of tripping off the surface is dealt with.
Also, this eliminates the chances of ruining the edges of your work. If you allow too much of a sander beyond the edge, you may cause the machine to tilt. This will likely eat into the wood, giving it an odd and unintended surface at the edge.
In this light, keep the machine, especially the large ones in check. Make sure no more than a third of the equipment is past the wood’s edge.
If you need to sand more than one edge of equal size, a process called gang-sanding can be very useful. This implies you join two or more edges together, sanding them in unison.
No Need to Tilt
Some of these machines are better at doing some jobs than others. For instance, belt sanders are better with very rough surfaces than the finishing sander.
Imagine you must use the finishing sanders on a pretty rough surface?
The somewhat sluggishness can make you think of cutting corners. In such cases, some woodworkers tend to tilt the machine. This is a bad practice that should be avoided, as titling the machine will do more harm than good. By tilting, you will likely create an uneven spot or ditch.
Correcting this mess can be an uphill task, sometimes altering the original design of the wooden piece. To prevent this, do not entertain the idea of tilting the machine.
Follow the Grain Pattern
If you look carefully at the wood, you will notice the linear pattern. When sanding with any of these sanders, you should align with this pattern. Sanding in an adjacent direction will be hectic and will give your work an odd look.
The hectic part is because while sanding, you will encounter raised grains in the opposing direction. This situation is more like swimming against the tide. You are going to spend more time and effort.
Furthermore, this will give the piece an odd look after you are done sanding. For getting the perfect look and feel, you should sand appropriately. This implies you sand in line with the grain pattern. If the grain pattern faces eastward, sand back and forth in that manner.
Let the Weight Take its Course
Sometimes you want more pace and aggression while working with your sander. This is especially the case with the sheet sanders and the palm sanders.
As a result, you might be tempted to apply that extra pressure while sanding. This is something you do not want to do because of the uneven paths it might create. Just allow the weight of the machine alone to take charge. Do not apply body pressure while using various kinds of sanders.
On another end, excessive body pressure on the sander affects the span of the pad and sandpaper grit. This is very common with lightweight machines such as the palm sanders.
With unwarranted pressure on the machine, the abrasive surface of the sandpaper grit wears off faster. It also reduces the attaching power of the Velcro pad.
Place Sanders for Use Before Using it
As earlier addressed, your sander should not be switched on, if it is not on the wood surface. The initial vibration of a sander is better off on the wood than outside it.
As a result of this, the machine should be placed on the wood before it is switched on for use.
Pencil Marks Are Not Bad Marks
First off, this is not a compulsory one for users. It is just a beneficial tip, especially for inexperienced hands.
Pencil marks can be used to monitor the even use of these machines on wood surfaces. This is not a hard nut to crack. First, crisscross pencil marks across the surface of the wood you want to sand. Secondly, sand the surface of the wood, using the pencil marks as a guide.
You might have to repeat this process over again. These marks will ensure you are not sanding some parts more than the others. It ensures you have a balanced and smoothly sanded surface.
Factor in the Wires
Handling a sander means you are dealing with lengthy wire, except for cordless sanders. As a result, you should factor in the wires while sanding. You do not want the wires to obstruct you while working.
There is no specific way to handle the wires while working. The secret is you identify what works for you and act in that regard. You can choose to strap the wires to your shoulders while working.
You can also choose to fold the wires in circular forms before working. Whichever way you resolve to deal with the wires, make sure you are convenient working. And just as a reminder, don’t take chances with naked wires.
Haven discussed the appropriate measures to take while sanding, let’s talk about some sanders and their peculiar qualities.
What are the Various Kinds of Sanders Available?
Some of the various sanders available include the Belt Sander, Random Orbit Sander, Sheet Sander, Palm Sander, Drum Sander, Dual Action Sander, and Edger Sander
“What are the Various Kinds of Sanders Available”
These are some of the notable sanders available for woodwork, auto-body work, and some kinds of metals. Let us discuss some of them.
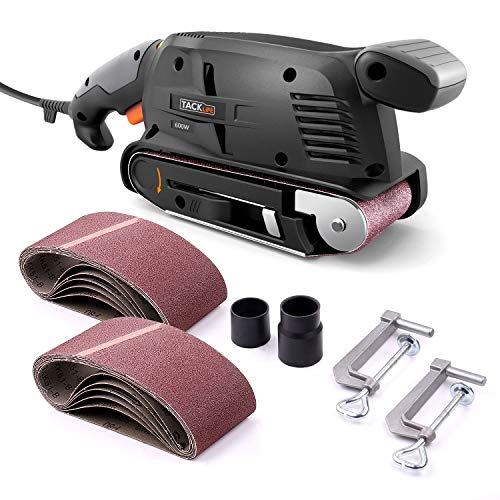
Belt Sanders
Essentially, these machines stand out for their ruggedness and quick pace with sanding. Considering their size, they are perfect for large surfaces and very rough exterior.
As a result of the pace and critical nature of sanding, this machine can be a nightmare for newbies. However, this should not be a concern as many products come with speed adjustable features.

As with the name belt sander, the sandpaper used has the shape of a belt. In inserting the circular sandpaper, you should take note of the arrows on the machine and the sandpaper.
You are to insert the sandpaper to align with the arrow on the machine. This means the machine will role in that motion.
Compared to some other sanders, belt sanders are not as good with trapping dust. As a better alternative, you might prefer the option of the vacuum rather than the inbuilt dust extraction mechanism.
Also, you should take safety precautions using the google, mask, ear protector very seriously.
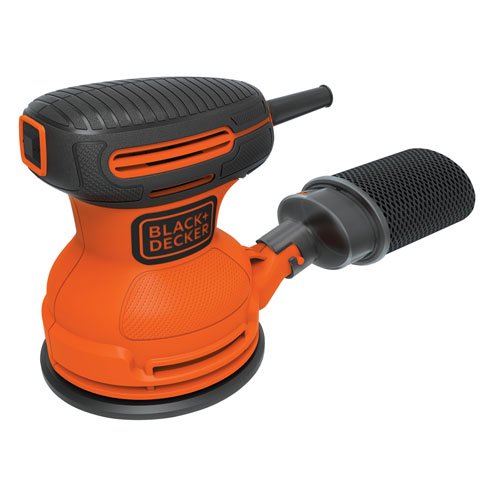
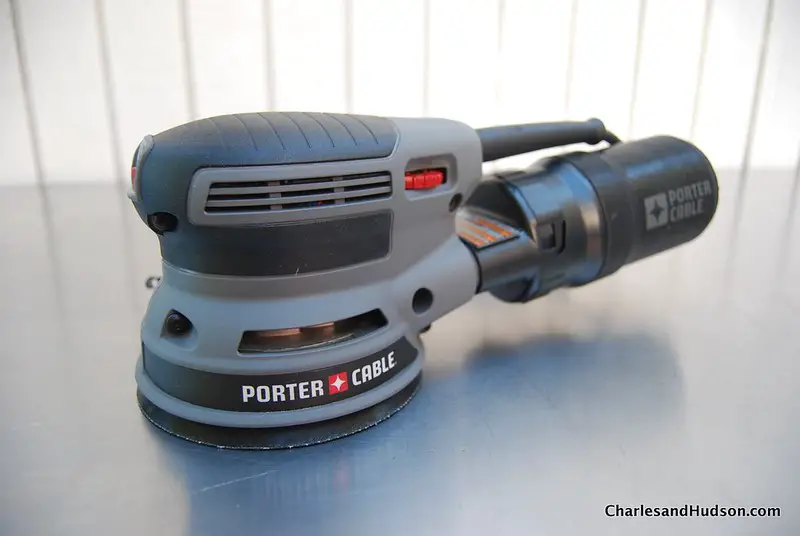
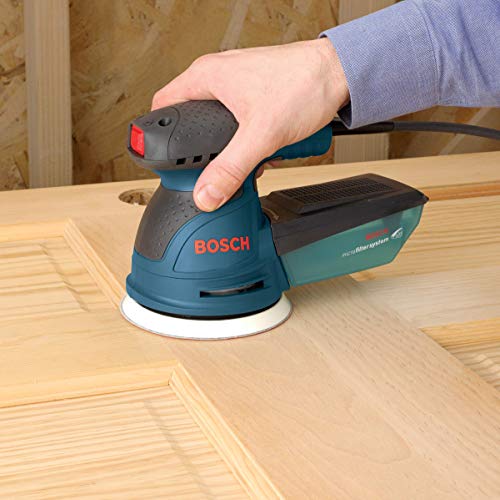
Random Orbit Sanders

In functionality, we like to think the random orbit sander falls in between the belt sander and the finishing sander. As with the belt sander, it can sand very odd and rough surfaces but has the tenderness of the sheet sander.
Furthermore, its handy nature allows you to use it on unusual surfaces. Such exteriors could range from concave to convex surfaces. This is an edge it has over the belt sander, given its size and shape.
This sander can be used to smoothen parts of an installed wooden door frame. The handiness makes it very easy to use.
This machine sands circularly. However, it adds some orbital variance. These combined sanding patterns leaves no stone untouched while sanding, ensuring there are no odd surface or scratches.
The sandpaper grits are usually attached to a Velcro pad. This convenience is top-notch compared to other alternatives. With the Velcro pad, you are not bothered about cocking and uncocking the sandpaper.

Undoubtedly, there is the right sander for various kinds of the sanding process. However, if any of these machines should be called the multitasking machine, the orbital sander readily comes to mind. It will do a pretty good job around almost anything.
Also, its dust extraction mechanism is impressive. The Velcro pad and sandpaper grit of these machines come with holes. On the smallest option around, the holes are no less than 6 – 7.
Extracted dust passes through these holes to the dust bag or attached vacuum. Compared to other options, this is an impressive way to extract dust.
Finally, some orbital sanders allow you to change the Velcro pad to smaller or larger sizes. This feature saves you the pain of getting another machine, as you can install various sizes of Velcro pad on one machine.
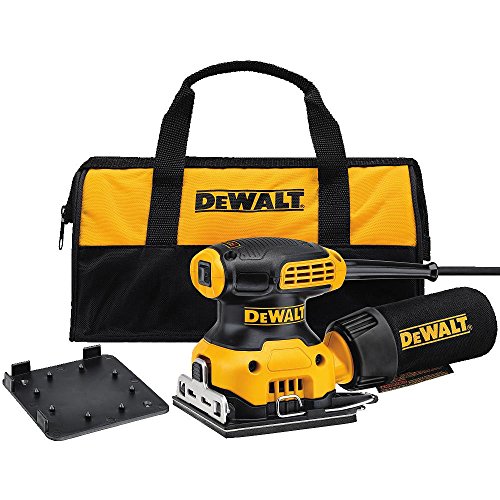
Sheet Sanders
For us, the sheet sander makes a better job better than it was. If you need final touches to already smoothened surfaces, the sheet sander is great at giving you that final touch of excellence.

In functionality, it is less aggressive than the belt sander or orbital sander. So, this would not constitute so much of a problem for newbies and inexperienced hands.
The sandpaper grit as the name suggests, is a sheet-like design. There are specific clamps at the ends that the sandpaper is fastened to. While fixing this sandpaper grit is not as easy as the orbital sander; it is also not a big deal.
Also, some brands have the option of Velcro pads, allowing the insertion of the sandpaper very easy. The abrasive surface of the Velcro pad fastens itself to the other end of the sandpaper grit.
As with the belt sander, these machines are better off with the vacuum, provided you have one. Although the sheets have holes that aid dust extraction, we prefer the option of the vacuum. This is also important because some of these machines do not come with a dust extractor.
Palm Sander
We love these kinds of sander for the flexibility it offers. If you ever thought the orbital sander was handy, wait till you see the palm sanders.
If you observe this equipment, some of them have the look of an electric iron at the base, while others are circular.
Of all the positives it offers, the ability to reach into seemingly impossible parts and angles is amazing.
Sometimes, you feel you are not done with sanding some tight corners. Well, in such situations, the palm sander is your best bet.

At its best, it does not have the pace and aggression of the belt’s, however, it is remarkable in its league.
Most of these machines do not come with a dust extractor. In this light, you might want to attach it to a vacuum.
In Conclusion
No doubt, sanders are amazing machines. In their various forms, the typical woodworker knows the importance of having them around. However, they must be used appropriately to give you the intended design.
In this regard, we have discussed important safety precautions to be observed while using these machines. As a rider, some of the actions to avoid have been discussed. In passing, the peculiarities of some sanders have been discussed.
On a final note, we’ll like to stress that the greatest finish does not exclude hand sanding. Regardless of how much work these machines have put in, they are at best robots. Ultimately, you can hand sand to get that needed design.
You can checkout these other in-depth articles/reviews…
- What Is a Da Sander – Peculiarities and Appropriate Use
- How to Use a Drum Sander – Advantages and Peculiarities
- How to Sand Hardwood Floors with Orbital Sander – A Guide
- What Is an Orbital Sander – How do they Work
- How Long to Wait Before Wet Sanding Clear Coat – Timely Details
- What Is Color Sanding – Color Sanding Your Car
How to Use a Sander – Related Frequently Asked Questions
Are Orbital Sanders Better than Palm Sanders?
Because of the size of the orbital sander, it is better than the palm sander when working on large surfaces. On the other hand, the palm sander is better at giving you a detailed finish. This is partly because it can reach into seemingly impossible places that other sanders cannot get to.
If you are particular about finishing the job in record time, the orbital sander is a better option. However, if you are very particular about getting every bit of the job well sanded, the palm sander is better.
Are You to Sand in a Circular Motion?
You should not sand in a circular motion. This will likely leave the finished piece looking awkward. Rather than sanding in a circular motion, you should sand according to the grain pattern. This will allow the finished piece to look natural but neat and great as well.
However, for sanders like the orbital sander, you may not follow the grain pattern. This is because of the orbital working feature of the orbital sander sanding disc. This sander ensures that the sanded area is neatly done. Other than such sander, all sanding should be strictly done in line with the grain pattern.
Do You Sand Before or After Spraying?
You are to sand before spraying your wood or metal. The sanding process is majorly to correct and even out any rough spot, scratch, or ditch in the item sanded. For woods with large pores, you need a good grain filler. After the sanding is properly done, you can spray. Depending on the kind of wood, you may choose to use the sanding sealer as a base coat before applying subsequent coats.
For most wood, the use of the sanding sealer is very helpful. It makes sanding easier. Other than that, it allows the wood and subsequent coats to bond easily.
What type of sander is best for refinishing furniture?
The palm sander is best for refinishing furniture. If the intent is to put a mild touch to an earlier sanded work, the palm sander is great. It corrects any previous flaw as it is delicate in its approach. Unlike the more intense and aggressive belt sander, the palm sander can attend to minute detail but does it carefully.
So, if you are seriously considering the best option for refinishing furniture, the palm sander is your best bet. The handy and small size of this equipment also allows you reach into places bigger sanding machines cannot get to.
Can the Orbital Sander be Used on Auto-Body?
The orbital sander is a sander that can be used on both wood and auto-body. For auto-body works, it can be used to strip off paint and correct severe scratches while wet sanding and color sanding. This is because it is handy and has a mild approach to sanding when compared to the belt sanders. The sanding disc of the orbital sander is very helpful for autobody work. When used appropriately, you get little or no orange peels.
There is also a variety of the orbital sander that can be used to effectively sand hardwood floors.
Where Can You Use the Orbital Sander?
The orbital sander can be used on almost every surface that allows the use of a sander. Both wood, metal, and auto-body can be sanding and refinished using the orbital sander. Also, there is a larger sized orbital sander designed to be used on hardwood floors. This sander is ideal for various kinds of hardwood floor sanding. It is not as aggressive as the drum sander, but also not as mild as the edger. This is why it is the right sander for many kinds of hardwood floor jobs.