Being an autobody and paint job guy is more of a visual thing. You do not need an expert to tell you a good job from a bad one.
From dealing with various levels of scratches to getting that desired glossy look for your car, what is the role of color sanding? How does it differ from wet sanding? First, let us try to define both wet sanding and color sanding?
Wet Sanding
With wet sanding, a series of sandpapers with lubricants are used to even the odd feel and look of a surface. For example, such irregularities corrected might be an orange peel.
The abrasive part of the sandpaper is used to get the affected surface back to its original shape. In doing this, lubricants are essential.
What Is Color Sanding
For those searching for that difference between wet sanding and color sanding, here it is. Wet sanding and buffing are integral parts of color sanding.
It is aimed at getting the clear coat of the panel surface to the best it can be. The next time you see a glossy looking car, think about the color sanding process.
If you prefer a visual explanation of this article, below is a detailed and helpful video.
Video: What Is Color Sanding (Color Sanding Your Car)
Differences Between Color Sanding and Wet sanding
Wet sanding is an integral part of color sanding. However, depending on the aim, it can sometimes stand out without being a part of color sanding. How about color sanding?
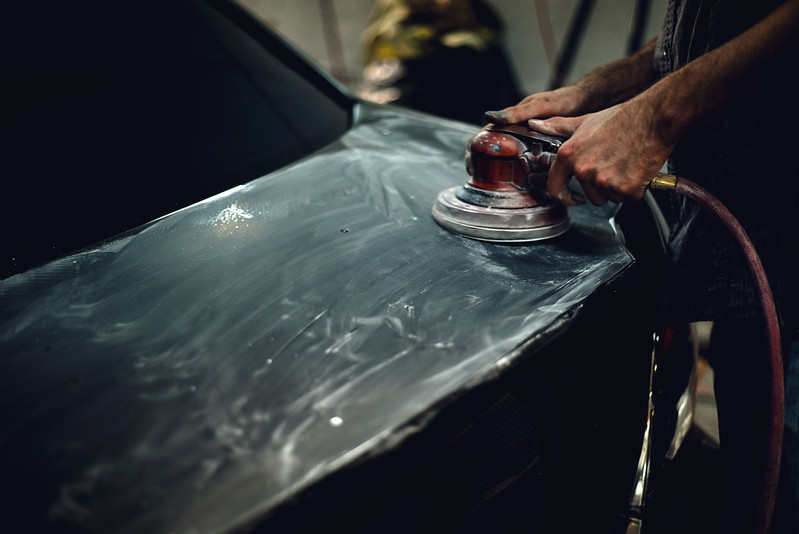
All things being equal, this is the usual pattern when color sanding. First, you use a power sander with a defined sandpaper grit to correct the surface. This action creates a powdery look and feel.
Secondly, the process of wet sanding takes effect. How is this? Slightly larger grit sandpaper is used to wash down the effect of the power sander.
As an illustration, let us suppose the power sander used 1500 grit sandpaper. The wet sanding process will in turn, use something slightly larger. The grit size of 2000 can work effectively in this regard.
So, let us remember how this works. First, the power sander works on the surface. Next, using a sanding pad or block, larger grit sandpaper is used to wash the sanded surface. For wet sanding, the use of lubricant is particularly important, hence the name wet sanding.
After the surface has been wet sanded to the desired state, the buffer is used. The buffer is the machine used to buff the wet sanded area. The buffer works by triggering friction and heat build-up at varying degrees, depending on the RPM.
Furthermore, the buffer works with something called a rubbing compound. This is a chemical solution that enables the buffer to achieve a glossy look with the surface. Without the buffer and rubbing compound, what is the fate of the color sanding?
First, there is no color sanding without the buffing process. It is one of the most essential aspects of color sanding. However, what happens when a panel is wet sanded without the buffing experience?
The surface will feel smooth but look dull. Except intended, that defeats the purpose of sanding. Considering the trend, having a glossy and attractive look is important when sanding. To achieve this, you need to buff appropriately.
If the aim is wet sanding alone, the power sander is avoided. You simply start by washing the surface with the sanding pad and sandpaper grit.
Why and When Do You Need to Color Sand
There are a couple of reasons why you may need to color sand your car. On the whole, some are necessary, while others are about giving the car and your eyes a treat. Let us examine some of the reasons why automobiles get color sanding.
Your Car Just Got Painted
A lot of times, getting a new paint job is the reason automobiles go through the color sanding process. When painting, there is the chance of the car getting an orange peel.
This is a scratch that looks like an orange peel. In a bid to correct this, color sanding is carried out on the car.
Time for a Glossy Look
By and large, color sanding consists of three parts: Power sanding, Wet sanding, and Buffering. Asides from correcting scratches, all of these processes help give the item a glossy look and feel.
Wrongly, many people credit the glossy look to the buffering process alone. This is wrong considering that it is a chain of events. The effects of both the power sander and wet sanding process are instrumental in the glossy turnout.
Dealing with the Adverse Effect of Accidents
The roads are busy and sometimes the crashes happen. In resolving the dents and scratches, color sanding is important.
If the accident is no more than a mere scratch, then color sanding alone will do. However, if the effect is beyond the clear and exterior coat, there may be a need for repainting.
Color Sanding A Car
For the record, automobiles are not the only items that can be wet sanded, buffed, or color sanded as a whole. Items such as the guitar and other general body works can go through this process.
Below is a visual explanation of how to color sand a car
Video: Short-Cut Color Sanding and Buffing Techniques for MIRROR Finishes
However, automobiles are the most common items that get color sanded. In light of this, let us aptly explain how a car gets color sanded. In this case, we will assume that the car has been painted and the coat is dry enough to go through color sanding.
Identify the Areas to be Color Sanded
It is not every time that all the exteriors are color sanded. Sometimes, it only has to do with few or selected parts of the vehicle. Before the whole thing, you are to figure out parts to be color sanded. You can use masking tape to demarcate the portions.
Put the Power Sander to Use
The power sander is a sanding device for this purpose. It comes with a sanding pad that will have sandpaper grit attached to it. It is a very flexible equipment considering that you can change the sandpaper to fit your color sanding job.
We advise you to start with a 1500 grit size sandpaper. When using the power sander, there are some things you should not do.
Firstly, do not apply too much pressure. Even while vertically holding the device, let its weight and ability take the full course. You are simply to guide the sander.
Secondly, do not tilt the sander, this may cause deep scratches you are not prepared to resolve. Furthermore, it is better to start the sander on the surface to be sanded. Do not start the sander outside of the working tool.
Also, do not sand in a stagnant manner. You are to move definitely from one point to the other. If you spend too much time on a surface, you may ruin the whole thing.
Wet Sanding Is Next in Line
After using the power sander, you should get the sanding pad or block ready. However, like an hour before this time, you are to soak the sandpaper and a rag in soapy water. Also, some advanced chemical solutions can be used for wet sanding.
For the sandpaper, you can either start with the last grit size used or something slightly bigger. If for example, you used a 1500 grit for the power sander, a 1500 or 2000 would do for wet sanding. Among many things, the idea of wet sanding is to wash the power sanded surface.
When you are certain the surface is smooth although dull looking, move on to the next stage.
The Shinny Glossy Buffering Part
At the end of the buffering stage, that is what you get – a gleaming glossy look. To achieve this, you are to use a rubbing compound on the wet sanded area first. Next, at a minimal RPM, use the buffer to buff the surface.
The combined effort of the rubbing compound, as well as the buffer, will get you the intended glossy look. That is what color sanding has to offer.
However, in using the sander, you must adhere to some rules. First, start with a minimal RPM, even if you will have to switch later on.
Secondly, do not use the buffer too long on a spot. The friction and heat build-up of the equipment may damage that area.
Thirdly, ensure the buffer is intact and set for use before engaging it. This is because it should not go off before it is finished with the buffering. Also, ensure that the rubbing compound is sufficient for the entire job.
Spray Wax – The Last Piece of the Puzzle
By now, you should have yourself a spectacle. The mirror-like surface should be staring you right in the face.
As a good way to round off, you can use the spray wax. These liquid items have properties that add more to the glossy surface. After you generously spray the parts, use a clean towel to rub thoroughly.
Final Note
You have the ball in your court. You can save yourself a lot of cash by doing the color sanding procedure yourself.
Do not forget the essence of color sanding and all of its intricate parts: Power sanding, wet sanding, and buffing.


![WD-40 Multi-Use Product with SMART STRAW SPRAYS 2 WAYS, 14.4 OZ [2-Pack]](https://m.media-amazon.com/images/I/51zKbE6lzrL.jpg)

