If you’re looking for tips on how to sand after spackling, you’ve come to the right place. Achieving a smooth finish after spackling can make all the difference when it comes to painting and final aesthetics.
This article guides you through the process, breaking it down into easy-to-follow steps.
Things You’ll Need
To embark on the task of sanding after spackling with efficiency and safety in mind, a complete set of materials should be at your disposal. Here’s a list and details on the materials you’ll need:
Fine-Grit Sandpaper (Typically 220-Grit):
220-grit sandpaper is generally recommended for finishing surfaces as it is abrasive enough to smooth out the spackle without causing damage to the wall.
Have an assortment of sandpapers on hand in case a coarser grit is needed for initial sanding of excess spackle, followed by the finer grit for finishing.
Sanding Block or Sanding Sponge:
A sanding block helps to evenly distribute pressure, reducing the likelihood of creating dips or grooves in the wall.
Sanding sponges are more flexible and can be easier to use on corners and edges. They can also be used for wet sanding if the situation calls for it.
Look for a dust mask rated for fine particulates. Masks with N95 certification, for example, can filter out most sanding dust. Ensure the mask fits well to prevent dust from being inhaled around the edges.
Goggles should have a seal around them to prevent dust from entering your eyes. Anti-fog features can be beneficial to maintain clear vision as you work. In addition to these primary materials, consider these supplementary items to enhance the process:
Drop Cloths or Plastic Sheeting:
Protect the floor and furniture from dust and debris. Cloth drop cloths are reusable, while plastic sheeting can be disposed of after use.
Useful for sectioning off the area where you will be sanding or protecting the trim and adjacent surfaces from accidental sanding.
Adequate lighting, such as a work light, is necessary to ensure you can clearly see the surface you’re working on and any imperfections that need to be addressed.
Vacuum with Fine Dust Attachment:
This will help with the cleanup process, allowing you to remove dust from your working area and the room in general.
After sanding, a tack cloth can be used for a final wipe-down to remove the smallest particles of dust from the surface before moving on to the next step.
Preparation
Preparation is crucial when you’re figuring out how to sand after spackling. Follow these steps:
Ensure Dryness:
Check the manufacturer’s instructions for the recommended drying time, which can differ based on the product composition and thickness of the application.
Conditions like humidity and temperature can affect drying times, so adjust your expectations accordingly. A drier, warmer climate can expedite drying, whereas a more humid environment may prolong it.
To be certain of dryness, gently press the edge of your fingertip against the spackle. If it feels firm and your finger comes away clean, the spackle is likely dry.
Put on Safety Gear:
A dust mask or a respirator is important to prevent inhalation of fine particles. Choose a mask rated for fine dust to ensure proper protection.
Safety goggles should form a seal around your eyes to prevent dust from entering. If you wear prescription glasses, look for safety goggles that can fit over them comfortably.
Consider wearing old clothing or an apron, as the sanding process can create a lot of dust that might cling to fabric.
Workspace Ventilation:
Open windows or use fans to ensure there is good airflow in the room where you are working. This helps to disperse dust and keep the air quality safe.
If possible, use a dust extractor or a vacuum with a fine dust filter to collect dust as you sand. Some sanders come with vacuum attachments for this purpose.
Protect the Surrounding Area:
Lay down drop cloths or plastic sheeting to catch dust and debris. This facilitates easier cleanup and protects your floors and furniture.
Use painter’s tape to section off the area if necessary. This helps to prevent accidental scuffing or sanding of adjacent surfaces.
Tool Selection:
Choose the right grit sandpaper for the job. Coarser grits (lower numbers) are for heavier sanding, while finer grits (higher numbers) are for finishing touches.
For larger, flat areas, a sanding block or pole sander can provide a more consistent and flat finish. For smaller areas or detail work, hand sanding might be more appropriate.
Consider using a wet sanding technique if you want to minimize dust. This involves using a damp sponge or sanding pad, though not all spackles are suitable for wet sanding, so refer to the manufacturer’s recommendations.
Lighting:
Good lighting is crucial to see imperfections and to ensure an even sanding job. Direct light at an angle to the wall; shadows and reflections can help highlight areas that need more attention.
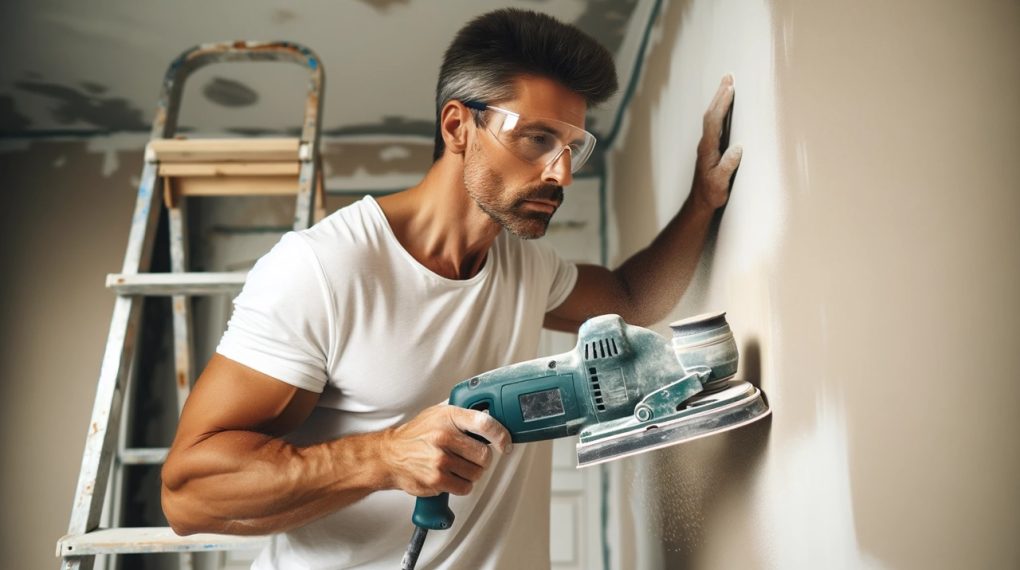
Sanding Technique
Here’s how to sand after spackling to get the best results:
Position the Sandpaper:
Attach the fine-grit sandpaper securely to the sanding block or sponge. Ensure there are no creases or bubbles that could lead to uneven sanding.
If you’re using a sanding sponge, take advantage of its pliable nature to conform to the shape of the area you’re working on, especially if it’s not perfectly flat.
Gently Sand:
Begin with a light touch, using circular or figure-eight motions to distribute the wear evenly and avoid grooves or patterns that straight strokes may create.
Maintain consistent pressure throughout, as pressing too hard can not only gouge the surface but also wear out the sandpaper more quickly.
Be especially cautious around edges and corners, where it’s easier to sand through the spackle and damage the underlying material.
Check Smoothness:
Every so often, stop sanding and feel the area with your hand to assess progress. A smooth surface shouldn’t have any noticeable ridges or bumps.
Look at the area from different angles using a light source to reveal imperfections you might not feel with your hand.
Wipe the area with a lightly dampened cloth to remove dust, which can make it easier to feel and see irregularities.
Adjust Technique as Needed:
If you detect low spots or imperfections, you may need to apply a bit more spackle and repeat the drying and sanding process.
For areas that require more attention, you may use a slightly coarser grit to start, then switch back to fine-grit to finish.
Sanding too much in one spot can create a depression, so spread out your efforts to gradually blend the spackle with the surrounding surface.
Dust Management:
Regularly remove accumulated dust from the sandpaper by tapping it gently against a surface or using a vacuum cleaner. This will help maintain the sandpaper’s effectiveness.
Before proceeding to painting or applying another coat, ensure all dust is removed from the wall with a damp cloth or tack cloth. Dust left on the surface can lead to a rough and unprofessional finish.
Final Inspection:
Once you believe the surface is smooth, do a final check by running a bare light bulb close to the wall. The sideways illumination will highlight any remaining flaws.
Use a handheld sander or sanding sponge for final touch-ups if needed, being cautious not to undo your smoothing efforts by over-sanding.
Cleanup
The last step in learning how to sand after spackling involves proper cleanup.
Remove Dust:
Begin with a wide brush or dry cloth to sweep off the majority of the dust from the walls.
Follow up with a damp cloth or sponge to capture finer particles. This cloth should be rinsed frequently to avoid re-depositing dust back onto the surface.
For a more meticulous clean, you can also use a tack cloth, which is designed to pick up even the smallest particles without leaving any residue.
Vacuum the Area:
Use a vacuum with a brush attachment to clear dust from any crevices or molding and to clean the floor. If you have a shop vacuum with a fine dust filter, even better.
Ensure you also vacuum around the room, not just the immediate sanding area, as dust can travel quite a distance from where you were working.
Dispose of Waste:
Collect and dispose of the used sandpaper, dust, and any other debris in a trash bag. Be mindful if the dust could contain potentially hazardous materials; you may need to follow certain disposal guidelines.
Check with local waste management regulations to ensure proper disposal, especially since construction materials can sometimes require special handling.
Clean the Tools:
If you used a sanding block or other reusable tools, clean them thoroughly for future use. Remove all dust and particles from the sanding block, and if using a sanding sponge, rinse it out until the water runs clear.
Final Inspection:
After you’ve cleaned the dust, inspect the room for any areas that might need additional cleaning.
It’s also a good time to check the wall for any spots that may need additional spackling or sanding touch-ups before you move on to priming or painting.
Air Quality Check:
It may be necessary to leave the windows open or continue running an air purifier for a while after cleaning to ensure all fine particulates are cleared from the air.
For more articles on sanding, click here: Sanding: Your Full-Circle Guide to Smooth Mastery
Conclusion: How to Sand After Spackling
In conclusion, sanding after spackling is a process that requires meticulous attention to detail, from preparation to the final cleanup. Ensuring that the spackled area is thoroughly dry sets the stage for effective sanding.
Equipping oneself with the proper safety gear is non-negotiable, as it protects your health and safety. Employing a gentle yet deliberate sanding technique, using circular motions with fine-grit sandpaper, and frequently checking for smoothness are the keystones of achieving a professional-grade finish.
Equally important is the comprehensive cleanup afterward, which not only preserves the integrity of your work but also maintains a clean and safe environment. Proper disposal of materials and ensuring all dust is removed will leave the workspace pristine and ready for the next steps in your project.
By adhering to these systematic practices, you will not only perfect the art of sanding after spackling but also ensure that the results are durable and aesthetically pleasing, reflecting the care and precision put into the task.
