Wondering how to sand without a sander? You’re not alone. Whether you’re in a situation where your sander has broken down or you simply don’t own one, fret not! This guide will walk you through five simple techniques that are equally effective.
Things You’ll Need
Before you begin to sand without a sander, gather the following materials:
Sandpaper in various grits
Scrap wood
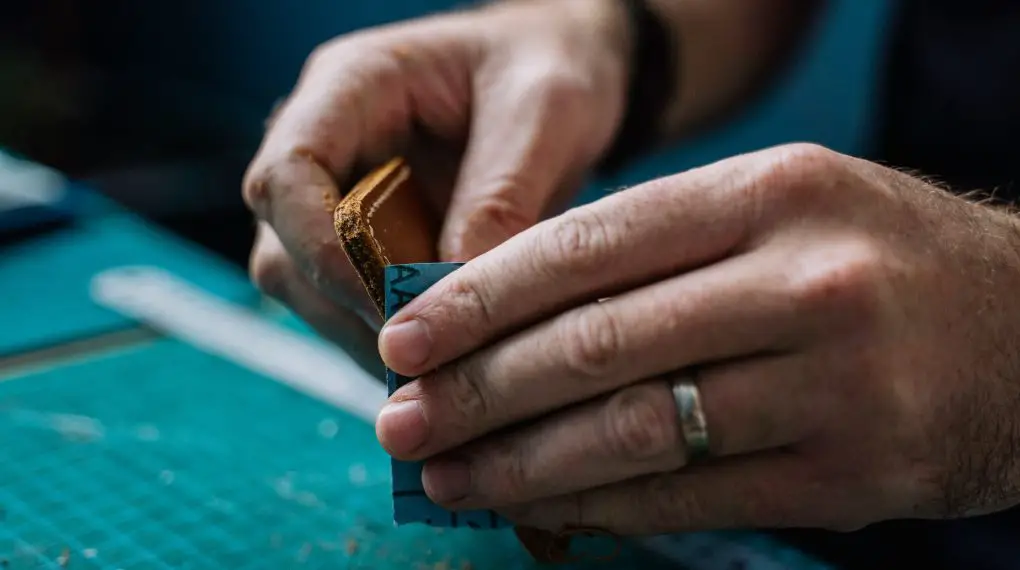
Using Sandpaper by Hand
The simplest and most straightforward method of sanding without a sander is to use sandpaper manually.
Though it may seem rudimentary, it’s a proven technique that has been used for generations. Below are the detailed steps to make this method work effectively for you.
Choose the Right Grit
Before you start, it’s crucial to select the appropriate grit size of sandpaper. The grit size will depend on whether you are sanding to remove paint, smooth out rough surfaces, or prepare wood for staining.
For rough surfaces or paint removal, consider a coarse grit like 40-60. For smoothing surfaces, a medium grit (80-120) is generally appropriate. For finishing touches, a fine grit, such as 150-220, would be suitable.
Always remember, starting with too coarse a grit could damage your surface, while a too-fine grit may make the process unnecessarily time-consuming.
Prepare the Surface
Before sanding, ensure that the surface you’re going to work on is clean and free of any dirt, grime, or debris. You can use a dry cloth or a slightly damp sponge to clean the surface.
Any loose particles left on the surface can get caught under the sandpaper, causing scratches that are harder to remove later. Let the surface dry completely if you used a damp cloth for cleaning.
Grasp the Sandpaper
Once the surface is prepared, take a sheet of your chosen sandpaper and hold it so that the grit side is facing down towards the surface you wish to sand.
You can either grip the sandpaper on both ends or fold it into a more manageable size, ensuring a firm grip. The goal is to maintain control while you are sanding to ensure an even finish.
Sand in Motion
With a firm grip on the sandpaper, you can start the actual sanding process. Move the sandpaper back and forth along the grain of the wood or surface material. You can also use circular motions, but be careful not to spend too much time in one spot to avoid creating an uneven surface.
Consistency is key, so try to apply the same amount of pressure throughout the sanding process. This is especially important when you’re learning how to sand without a sander, as it’s easier to be inconsistent with manual methods.
Clean Up
Once you’ve completed the sanding to your satisfaction, it’s important to clean up the surface to remove any residue. Use a dry cloth to wipe away the majority of the sanding dust.
For a more thorough clean, you can also use a slightly damp cloth to pick up finer particles. Make sure to let the surface dry completely if you used a damp cloth. This ensures that you have a clean, smooth surface for any subsequent treatments like painting or staining.
Creating a Sanding Block
Using sandpaper by hand is effective, but it can become tiring and lead to inconsistent results, especially for larger projects.
If you find it challenging to grip sandpaper for extended periods, a DIY sanding block can be an excellent solution. Creating a sanding block is a simple process, and you probably already have everything you need at home. Here’s how to do it:
Select a Block
The first step in creating a sanding block is to find a piece of scrap wood that fits comfortably in your hand. Ideally, the block should be flat, smooth, and devoid of any splinters or rough edges.
The size of the block can vary depending on your needs; however, it should be large enough to hold easily but small enough to maneuver around the surface you are sanding.
If the block has any rough edges, you might want to sand them down to prevent accidental scratches on the surface you’ll be working on.
Wrap the Sandpaper
Once you’ve chosen your block, the next step is to wrap a sheet of sandpaper around it. Make sure the grit side of the sandpaper faces outwards.
If the sandpaper is larger than the block, you can cut or fold it to fit the block’s size better. The sandpaper should cover as much of the block’s surface area as possible, which will help you sand more evenly and efficiently.
Secure the Sandpaper
After wrapping the sandpaper around the block, you’ll need to secure it in place. This can be done using tape, staples, or even an elastic band.
Make sure that whatever you use to secure the sandpaper does not create a bump, as this can cause uneven sanding. Check that the sandpaper is snugly fit and won’t slip while you’re sanding.
Sand the Surface
With your DIY sanding block prepared, you can start sanding the surface. Hold the block firmly and move it back and forth or in circular motions across the surface.
Apply even pressure throughout the process to ensure a uniform finish. A sanding block often provides more control than using sandpaper by hand, making it easier to apply consistent pressure.
Inspect
As you sand, frequently lift the block to inspect the surface. This ensures that you’re achieving an even sanding and not accidentally gouging or over-sanding any areas.
If you notice any uneven spots, you can focus your efforts there for a moment before returning to sand the entire area.
Sandpaper Glove Method
If you’re looking for a method that offers more dexterity and control, the Sandpaper Glove Method is worth considering. It involves attaching a piece of sandpaper to a glove, essentially turning your hand into a sanding tool.
Put On a Glove
Begin by wearing a rubber glove on the hand you’ll be using for sanding. The glove will serve to protect your skin from the rough sandpaper and any particles that might be generated during the sanding process.
Attach Sandpaper
Take a piece of sandpaper and tape it to the palm of the glove. Make sure it’s securely attached so that it doesn’t slip or move around while you’re sanding.
The size of the sandpaper piece should be large enough to cover the area you intend to sand but not so large that it becomes unwieldy.
Start Sanding
With the glove and sandpaper in place, proceed to sand the surface. Hold your hand flat against the surface and move it back and forth or in circular motions.
Because your hand is more flexible than a block or piece of wood, this method allows for greater control and can be particularly useful for sanding curved or irregularly shaped objects.
Inspect
As with the other methods, periodic inspection is key to achieving an even sanding. Lift your hand regularly to inspect the surface for any unevenness or imperfections. If any are found, you can easily focus on those specific areas to even them out.
Using a Scouring Pad
Scouring pads aren’t just for cleaning dishes; they can also serve as useful tools for light sanding tasks. This method is particularly beneficial for those who need to sand a small area or perform a minor touch-up. Here’s how to go about it:
Select a Scouring Pad
First and foremost, you’ll need to choose a scouring pad that is appropriate for the surface you intend to sand.
Scouring pads come in different levels of abrasiveness, so make sure to select one that matches your sanding needs. A less abrasive pad is typically good for delicate surfaces, while a more abrasive pad can handle tougher jobs.
Prepare the Surface
Before you begin sanding, it’s crucial to prepare the surface. Clean it thoroughly to remove any dust, dirt, or debris that could interfere with the sanding process.
You can use a damp cloth depending on what the surface material can tolerate. Make sure the surface is completely dry before you proceed.
Sand Lightly
With your scouring pad in hand and the surface prepared, you can start the sanding process. Apply the pad to the surface and use light, even strokes to sand the area.
Because scouring pads are generally less abrasive than sandpaper, you’ll need to use a little more elbow grease to achieve the desired results. However, the benefit is that they offer greater control, especially on smaller or more delicate surfaces.
Inspect
Consistent inspection is important to ensure you’re achieving an even finish. Pause periodically to check the surface for any irregularities, spots that you might have missed, or areas that may require a bit more attention.
If you find uneven patches, spend a few extra moments sanding them down to match the rest of the surface.
For more articles on sanding, click here: Sanding: Your Full-Circle Guide to Smooth Mastery
Conclusion: How to Sand Without a Sander
Knowing how to sand without a sander can be a handy skill for any DIY enthusiast. The methods mentioned in this guide are simple, effective, and require materials that you probably already have at home. Happy sanding!