Are you struggling with the finishing touches on your resin 3D prints? This comprehensive guide on how to sand resin 3D prints will walk you through each step, ensuring you achieve a flawless finish.
Why Sand Resin 3D Prints?
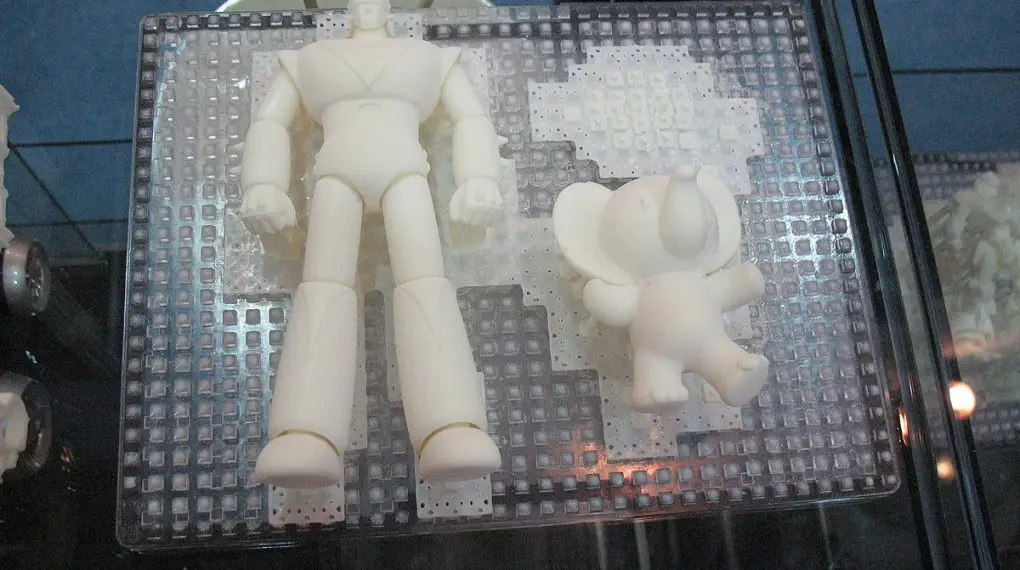
When you complete a resin 3D print, the final product may have noticeable layer lines and surface imperfections. Sanding is a technique to smooth out these rough edges and create a polished end result.
How to Sand Resin 3D Prints: Tools You Will Need
- Sanding paper (grits 220, 400, 800)
- A flat work surface
- Soft cloth
- Water
- Respirator mask
Step 1: Safety Precautions
Safety comes first, so don’t skip this step. Pop on a respirator mask to keep those tiny resin particles out of your lungs. Trust us, your respiratory system will thank you.
Why Wear a Respirator Mask?
When you’re sanding your resin print, particles will fly. Inhaling these can be harmful, so a mask is your go-to protection.
Which Mask to Choose?
Look for an N95 or higher-rated mask. These masks are designed to catch particulates, making them perfect for this task.
How to Wear Your Mask:
1.Inspect: Before wearing, give it a quick look-over for any damage.
2.Clean Hands: Always start with clean hands.
3. Position It: Hold the mask by the straps, placing it over your nose and mouth.
4. Strap Up: First the top strap over your head, then the bottom strap. They should sit high on the back of your head and at the base of your neck.
5. Seal the Deal: Pinch the nose piece to your nose’s shape. Double-check for a snug fit.
Bonus Safety Tips:
1. Air It Out: Make sure you’re in a well-ventilated area. Open windows or use a fan to circulate the air.
2. Gear Up: Throw on some protective clothing and safety goggles for full coverage.
Now that you’re all suited up and ready to go, you can sand away without a worry. Safety first, right?
Step 2: Prepare the Work Area
Setting up your work area is like laying the foundation for a house—do it right, and everything that follows is a breeze.
For starters, you’ll need a flat work surface.
Why a Flat Work Surface?
A flat work surface ensures that your resin print stays stable while you’re sanding. No wobbling, no sliding—just a smooth, even finish.
Light It Up
Good lighting is your best friend here. A well-lit area helps you see what you’re doing, so you can catch any imperfections. You don’t want to miss a spot, do you?
No Mess, No Stress
Keep your work area free from clutter and debris. Extra particles can get in your way or even scratch your print. A clean workspace sets you up for a clean finish.
Preparing Your Work Area Step-by-Step:
1. Pick a Surface: Choose a flat table or bench. Avoid soft or uneven surfaces like beds or couches.
2. Shine On: Use a table lamp or work light if natural light isn’t enough. Make sure the light source is stable so you can focus on the task at hand.
3. Tidy Up: Remove any objects or debris from the work area. You want zero distractions and zero risks of contaminating your project.
4. Layout Tools: Place your sanding paper, water, and cloth within arm’s reach, so you can easily switch between grits or clean the print.
By taking the time to prepare your work area, you’re setting yourself up for success. Good setup equals great results.
Step 3: Wet Sanding
Ready to get your hands a little wet? Wet sanding is the secret sauce to a smooth and shiny resin print. But what’s the big deal about adding a splash of water, you ask? Let’s dive in!
The Magic of 220-Grit
Starting with 220-grit sandpaper is like warming up before a run. It’s coarse enough to tackle those stubborn layer lines but won’t gouge your print. It’s your opening act!
Water: The Unsung Hero
Why water? Well, it’s not just to make a splash. Dipping your sandpaper in water cuts down on friction, which means less heat and a smoother ride for your sanding paper. Think of it as power steering for your print!
Circle of Life, or Just Sanding
Circular motions are the name of the game. They ensure even sanding so you don’t end up with uneven patches or grooves. Keep it gentle—let the sandpaper do the hard work.
Wet Sanding Step-By-Step:
1. Prep Your Paper: Dip that 220-grit sandpaper in water. Don’t drench it; just a quick dip will do.
2. Easy Does It: Place your hand flat against the sandpaper and start making those circles on the surface of the print. No need to press down like you’re scrubbing a stubborn stain.
3. Keep It Wet: Re-dip your sandpaper in water as needed. If it’s not gliding smoothly, it’s time for a dip.
4. Inspect: Take a pause and look at your work. If the layer lines are less visible, you’re doing it right!
Wet sanding is like the conditioner to your shampoo, the milk to your cookie. It adds that extra oomph to your sanding game. So, wet that sandpaper and start making those circles. Your print will thank you!
Step 4: Move to Higher Grits
So, you’ve mastered the art of 220-grit, and your print’s looking smoother than a jazz saxophonist on a Saturday night. What’s next? Time to climb the grit ladder!
Why Move to Higher Grits?
Think of grits like levels in a video game. You start with the beginner level (220-grit) to get rid of the big, bad layer lines. But to unlock that ultra-smooth, can’t-keep-your-hands-off-it texture, you’ve gotta level up!
The 400-Grit Sweet Spot
Ah, the 400-grit! It’s like the medium roast of sandpapers—not too strong, not too light. It’ll pick up where the 220-grit left off and take your print’s smoothness up a notch.
The Grand Finale: 800-Grit
Last but definitely not least, welcome the 800-grit sandpaper, the VIP of your sanding party. This ultra-fine grit will put the cherry on top, leaving your print with a sheen that’s nothing short of professional.
Step-by-Step to Sanding Nirvana:
1.Switch to 400-Grit: You’ve conquered the 220, now switch to 400-grit. Give it a dip in the water and get back to your circular motions.
2. Feel the Difference: As you sand with 400-grit, you’ll notice your print becoming silkier. You’re now in the smooth zone!
3. Step up to 800-Grit: Time to bring in the closer. Wet the 800-grit sandpaper and get to work. You’re adding the final glossy touch.
4. Admire: Once you’re done, take a step back and admire the sheen. Feel the surface; it should be as smooth as a hot knife through butter!
Climbing the grit ladder may seem like a chore, but remember: great things take time. And in this case, the result is a 3D print so smooth, it’ll look like it was made by the gods of sanding themselves. Keep climbing, my friend, you’re almost there!
For more articles on sanding, click here: Sanding: Your Full-Circle Guide to Smooth Mastery
Step 5: Clean the Print
Ah, the finishing touch! You’ve sanded your way to glory, climbed the grit ladder, and now your resin print is smoother than a perfectly frothed latte. But wait, we’re not done yet. Time to give your masterpiece a final buffing!
Why a Soft Cloth?
Why not just rinse it under water, you ask? A soft cloth picks up those tiny leftover particles that water can’t. Plus, it helps you maintain that newly acquired sheen without adding new scratches.
No Lint, Please!
Choose a lint-free cloth for this task. The last thing you want after all that hard work is to have pesky little lint particles sticking to your silky-smooth print. A microfiber cloth is a good choice here.
Buff, Don’t Scrub
Remember, your resin print is not a dirty skillet. No elbow grease needed. A gentle wiping motion will do the trick.
Clean It Like You Mean It: Step-By-Step
1. Grab Your Cloth: Take a soft, lint-free cloth and fold it into a manageable size.
2. Start Wiping: Gently wipe the surface of the print in circular motions. Imagine you’re detailing a luxury car—every curve counts.
3. Inspect and Repeat: Check to make sure you’ve gotten all the residual particles. If not, give it another gentle wipe.
4. Final Look: Once you’re satisfied, hold up your print and marvel at its glossy finish. It should feel smooth to the touch and look absolutely stunning.
Voila! You’ve officially graduated from Sanding University with honors. Your print should now be the epitome of smoothness, the pinnacle of polish. Now, go ahead, show it off—your resin 3D print is ready for its close-up!
Conclusion
Sanding your resin 3D prints might seem daunting, but with this step-by-step guide, the process is straightforward and manageable. Take your time and your prints will turn out looking professional.