Wondering how to sand out orange peel? This may seem like a daunting task, but with the right tools and guidance, you can achieve that smooth, blemish-free surface you’ve always wanted. In this step-by-step guide, we’ll cover everything you need to know, from choosing the right sandpaper to mastering the technique.
What You Will Need
Sandpaper (120, 180, and 220 grit)
Orbital sander or sanding block
Drop cloths
Step-by-step Process
Here are the steps you’ll need to take…
Step 1: Prepare the Surface
Before you begin, it’s essential to prepare the area you’ll be working on. First, remove any furniture, wall hangings, or obstacles that might get in your way. Clearing the area makes it easier to maneuver and ensures nothing gets damaged.
Next, lay down drop cloths on the floor and over any furniture you can’t remove to catch any dust and debris that may result from the sanding process.
Finally, use painter’s tape to tape off edges, corners, and any trim or moldings to protect adjacent surfaces from accidental scuffing or sanding. By preparing well, you set the stage for a smoother, more efficient process.
Step 2: Choose the Right Sandpaper
Selecting the appropriate sandpaper is a pivotal step in your journey to successfully sand out orange peel texture. Starting with a 120-grit sandpaper offers you a well-balanced approach to this task. Here’s why this particular grit hits the sweet spot:
Balance Between Abrasion and Control
The 120-grit sandpaper strikes an optimal balance between its abrasive capabilities and your ability to control it. A grit that’s too coarse could gouge or damage your walls, whereas a grit that’s too fine might not be effective in removing the orange peel texture.
With 120-grit, you get enough abrasion to tackle the textured surface without losing the finesse required for a smooth finish.
Coarse but Cautious
While this 120-grit sandpaper is coarse enough to address the textural challenges of an orange peel surface, it’s also gentle enough to minimize any risk to the wall beneath.
This dual capability allows you to proceed with confidence, knowing that you’re effectively treating the issue at hand without creating new problems in the process.
Longevity and Practicality
Sandpaper tends to wear out, especially when you’re working on a larger area or dealing with particularly stubborn textures. For this reason, it’s a good idea to have multiple sheets or rolls of 120-grit sandpaper on hand.
Running out of sandpaper mid-project can disrupt your workflow and affect the uniformity of the job, so it’s always better to be over-prepared in this aspect.
Step 3: Equip Your Sander
Now that you’ve chosen your sandpaper, it’s time to attach it to your orbital sander or sanding block. If using an orbital sander, make sure the device is unplugged while attaching the sandpaper.
Once securely attached, plug in the sander and set it to a moderate speed, usually a mid-range setting. A moderate speed allows for controlled sanding without digging too deep into the wall surface.
Step 4: Safety First
Before you start sanding, it’s essential to prioritize your safety. Wear a dust mask to protect your respiratory system from inhaling fine particles. Safety goggles are also important to shield your eyes from dust and debris. Some people also opt for ear protection, especially when using power sanders, as they can be quite loud.
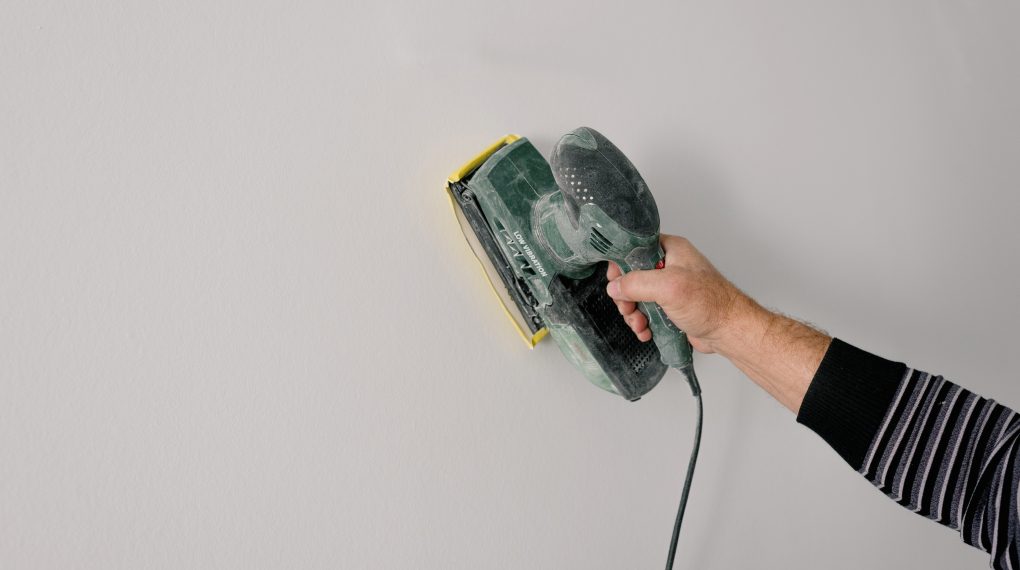
Step 5: Start Sanding
With your safety gear on and your sander prepared, you’re ready to start sanding. Approach the wall and begin sanding in a circular motion, maintaining consistent but moderate pressure as you go.
Make sure you cover all areas affected by the orange peel texture, sanding uniformly for the best results. Keep an eye out for signs of over-sanding, such as the wall material becoming visible or damaged.
Step 6: Assess and Repeat
After completing your initial pass with the 120-grit sandpaper, step back and assess the surface. Run your hand lightly over the wall to feel for remaining textured areas.
If the orange peel texture is still evident, switch to a 180-grit sandpaper and go over the surface again. This finer grit will help to smooth out any remaining imperfections.
Step 7: Finishing Touches
Once you’re satisfied that you’ve removed the orange peel texture, it’s time for the finishing touches. Switch to a 220-grit sandpaper to give your wall a final smoothing. This will prepare the surface perfectly for the next steps, which include priming and painting.
After you’ve completed the final pass with the 220-grit sandpaper, you’re ready to remove the painter’s tape, clean up, and proceed to prime and paint your beautifully smooth wall.
For more articles on sanding, click here: Sanding: Your Full-Circle Guide to Smooth Mastery
Conclusion: How to Sand Out Orange Peel
Successfully learning how to sand out orange peel texture from your walls can significantly enhance the visual appeal and quality of your space. While the process might initially seem intimidating, with the right tools and a step-by-step approach, you can tackle this project with confidence.
From preparation and safety to sanding and finishing, each phase is essential for achieving that sleek, blemish-free surface you desire. And the great news is, this is a skill that, once mastered, will serve you well in future home improvement projects.
So take your time, follow these comprehensive guidelines, and you’ll be well on your way to transforming your walls from flawed to flawless.