If you’re looking to complete a home renovation, knowing how to sand and mud drywall is crucial. This comprehensive guide will walk you through each step to achieve a flawless finish.
Preparation
Before you can start the process of mudding and sanding, preparation is key.
Step 1: Gather Your Supplies
The first item on your list should be joint compound, commonly known as mud. There are different types to choose from—ready-mixed and setting-type. Ready-mixed is convenient but takes longer to dry, whereas setting-type dries more quickly but may be a bit harder to work with for beginners. Choose one that fits your comfort level and project timeline.
A taping knife is essential for applying the joint compound smoothly. They generally come in widths ranging from 4 to 12 inches. A 6-inch knife is a good starting point for beginners, but having a 12-inch knife can be helpful for feathering out the compound.
Drywall tape helps reinforce the seams between the drywall panels. You can find paper tape or fiberglass mesh tape. Paper tape is often easier to hide, while mesh tape is easier to apply but may require a setting-type compound.
A sanding block or fine-grit sandpaper (around 150-220 grit) is necessary for smoothing out the dried joint compound. Some people also use a sanding sponge, especially for corners and edges.
Safety should never be compromised. A good quality dust mask is a must to avoid inhaling drywall dust. Goggles will protect your eyes during both the mudding and sanding processes.
Step 2: Prepare the Area
Begin by covering the floor with plastic sheets or a drop cloth. This not only protects the flooring but also makes cleanup easier. Secure the edges with painter’s tape to keep it in place.
If the room has furniture, it’s advisable to remove it. If that’s not possible, cover the furniture with plastic sheets to protect them from dust and joint compound splatters.
Before you start, make sure the drywall is securely fastened to the wall studs. If you notice any loose screws or nails, now is the time to secure them. Make sure that the seams between the drywall sheets are tightly fitted. Gaps larger than 1/8-inch should be filled with setting-type joint compound before taping.
Good ventilation is essential, especially when you’re sanding. Open windows if possible, and consider setting up a fan to help circulate the air. Always read and follow safety guidelines related to ventilation when working with construction materials.
Mudding
This is where you’ll apply the joint compound to the seams between drywall panels.
Step 1: Apply the First Layer of Mud
Before you start applying, give your joint compound a good stir. This ensures it’s smooth and easy to spread. If you’re using a setting-type compound, prepare it according to the manufacturer’s directions.
Holding your taping knife at a 45-degree angle to the wall, spread a thin layer of joint compound over the seams where two pieces of drywall meet. This first layer serves as a bedding for the drywall tape, so it doesn’t need to be thick—just enough to cover the seam.
Immediately after applying the initial layer of mud, take your drywall tape and gently place it over the seam, centering it so that half of the tape adheres to one sheet of drywall and the other half to the adjoining sheet.
Using your taping knife, press down on the tape, starting from the center and working your way towards the ends. This embeds the tape in the mud and removes any air bubbles.
Once the tape is embedded, apply another thin layer of joint compound over it. This doesn’t have to be perfect; you will be adding more layers later. The aim is to cover the tape completely.
Step 2: Smooth Out the Mud
After the second layer is on, use your taping knife to make sure the joint compound is spread evenly. It’s better to have a consistent but slightly thicker layer than to scrape it too thin.
Hold your taping knife at a steeper angle and run it over the freshly mudded area to remove any excess compound. This makes the wall smoother and reduces the amount of sanding you’ll need to do later.
To blend the joint compound seamlessly with the drywall, apply a little pressure on one edge of your taping knife while feathering out the edges of the compound, making it thinner towards the edges.
Let the joint compound dry according to the manufacturer’s recommendations. Some types may dry within a couple of hours, while others might take up to 24 hours. Make sure it is completely dry before proceeding to the sanding step.
Once it’s dry, inspect your work. Look for any ridges, air bubbles, or rough spots. These will need to be addressed in the subsequent steps.
Sanding
Once the mud is dry, it’s time to sand the walls to a smooth finish.
Step 1: Safety First
Before commencing, ensure that your mask fits snugly over your nose and mouth without any gaps. Your goggles should also fit securely, without pressing uncomfortably against your face.
Although your mask will protect you from inhaling most particles, proper ventilation is still important. Make sure windows are open or a fan is operating to help dissipate dust.
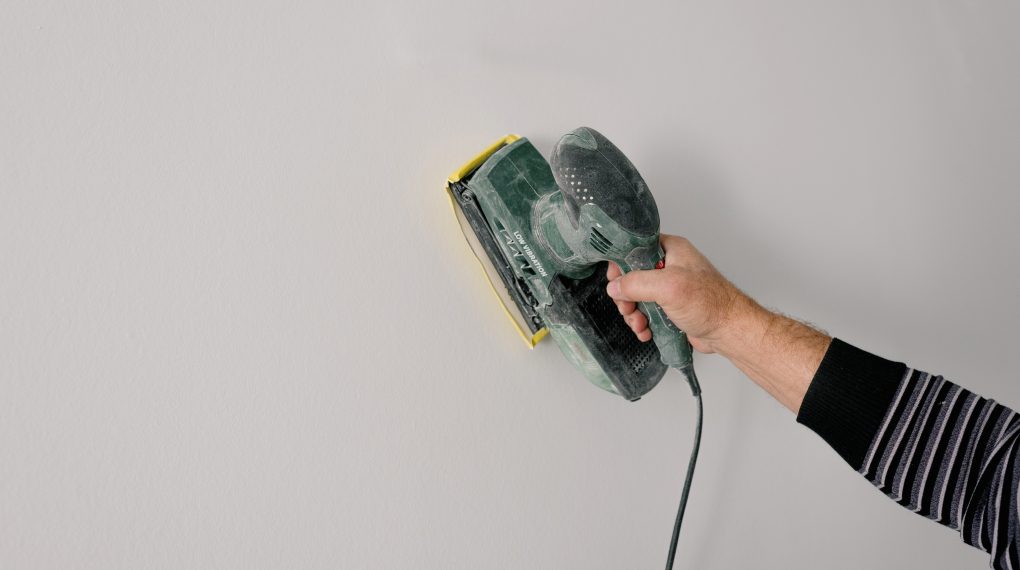
Step 2: Start Sanding
Whether you opt for a sanding block or sandpaper, the key is to choose a tool that you’re comfortable handling for an extended period. A sanding block often provides better grip and pressure distribution, while individual sheets of sandpaper may be easier for maneuvering into corners and other tight spots.
Before you go all in, it’s wise to test a small, inconspicuous area first. This will give you a feel for how much pressure to apply during the sanding process without damaging the wall.
Hold your sanding block or paper flat against the wall and move it in a circular motion. Avoid pressing too hard; let the sandpaper do the work. The objective is to make the wall as smooth as possible without digging into the drywall itself.
Edges and corners are especially prone to unevenness because they often have excess joint compound. Take your time in these areas, employing the edge of your sanding block or a folded piece of sandpaper to smooth these sections carefully.
Pause regularly to run your hand over the sanded areas to check for smoothness. Any lingering bumps or ridges will be easier to address now rather than later.
Finishing Touches
After sanding, you’re almost done. Just a few more steps to complete your drywall project.
Step 1: Clean the Walls
For this task, a microfiber or lint-free cloth is ideal. These types of cloths effectively pick up dust without leaving behind any fibers that could interfere with your painting.
Slightly dampen the cloth with clean water. Make sure it’s damp but not soaking wet, as excessive moisture could damage the drywall or dilute the joint compound.
Gently wipe down the walls in a systematic manner, starting from the top and moving down to capture all the sanding dust. The goal here is to remove as much dust as possible to ensure that your primer and paint adhere properly.
After you’ve wiped down the walls, take a moment to inspect them carefully. If you find any areas you may have missed, go back and wipe those down as well.
Allow some time for any moisture to evaporate before moving on to priming. This usually doesn’t take long, especially if you used a damp cloth rather than a wet one.
Step 2: Prime and Paint
Choose a quality drywall primer that’s suitable for your type of wall and the paint you’ll be using. The primer helps the paint adhere to the wall and provides a more even finish.
Using a roller for larger areas and a brush for corners and edges, evenly apply a coat of primer to the wall. Work in sections to maintain a wet edge, ensuring a more uniform finish.
Allow the primer to dry according to the manufacturer’s instructions. This can vary, so be sure to read the product’s guidelines.
Now it’s time to choose your paint. Whether you’re going for a matte, semi-gloss, or glossy finish, make sure it’s appropriate for your wall type and room function.
For more articles on sanding, click here: Sanding: Your Full-Circle Guide to Smooth Mastery
Conclusion: How to Sand and Mud Drywall
You’ve successfully learned how to sand and mud drywall. With patience and the right techniques, you can achieve professional-looking results on your own.